Getting Started#
The guide provides all information to a new user of OpenSpace to install the software and start it for the first time.
The best-supported platform for running OpenSpace is a Windows 10 or Windows 11 machine with at least 8GB RAM and a discrete graphics card (NVidia cards work best, but AMD cards work with some issues). The Hardware Requirements page contains minimum requirements for each profile.
Installation#
To install OpenSpace, you download the .zip file from the OpenSpace homepage and unzip the file.
Right click on the .zip file, select “Extract All…”, and follow the guide. You can place the resulting folder anywhere you want, but we suggest a location inside your User directory, for example the Documents folder. There is no problem having multiple versions of OpenSpace installed in parallel.
@TODO
You can place the resulting folder anywhere you want, but we suggest a location inside your home directory. There is no problem having multiple versions of OpenSpace installed in parallel.
If you decide to uninstall OpenSpace, you simply delete the folder.
Once you have installed OpenSpace from the .zip file, it’s time to run it. The executable OpenSpace can be found in the bin directory and you can start it by double-clicking the application. After this, you should see the Launcher window:
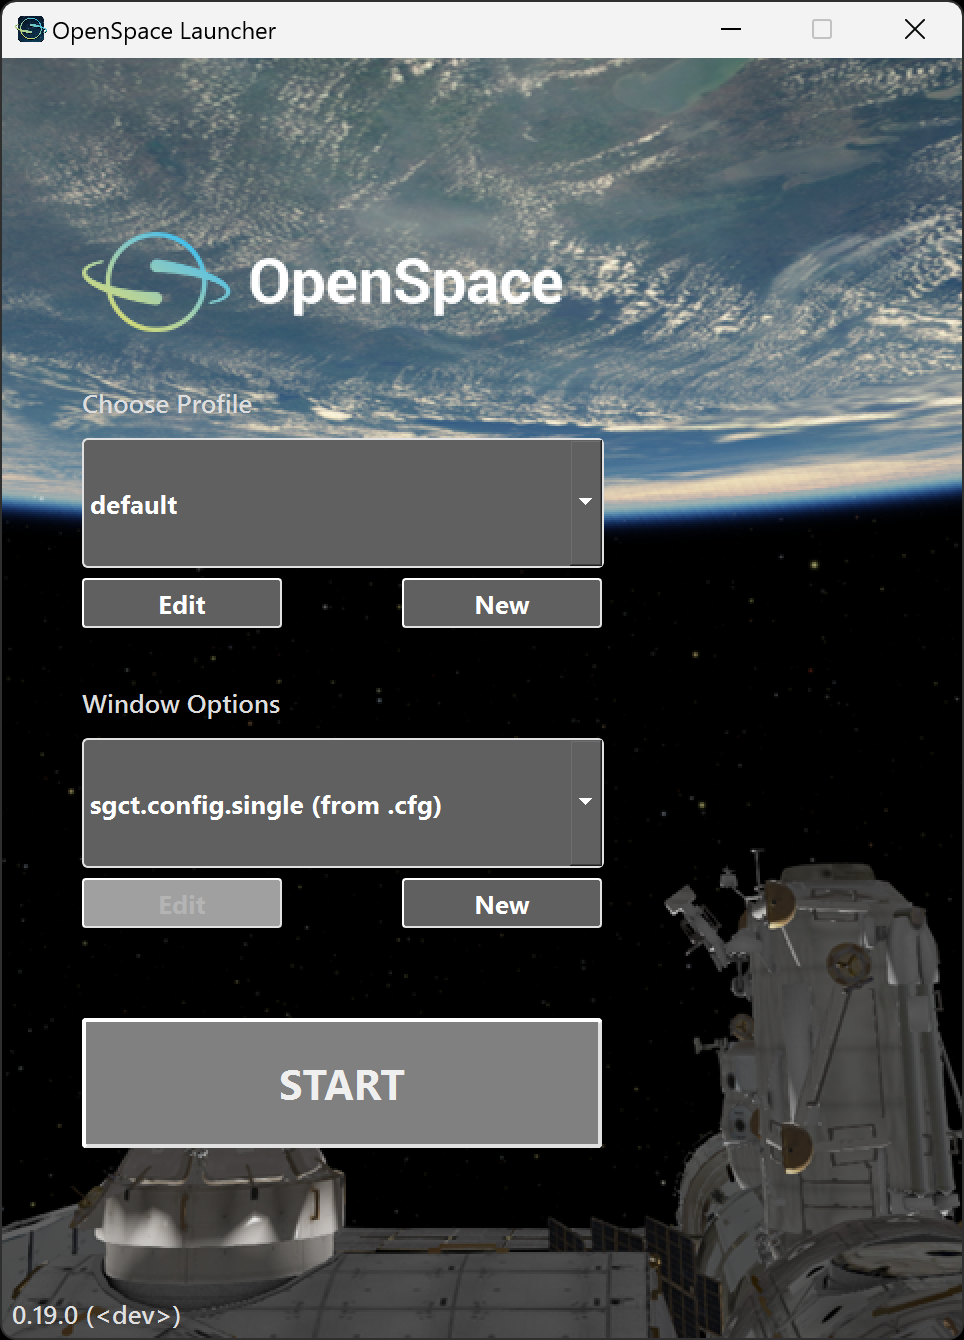
The Launcher window presented after starting OpenSpace#
If you instead see the error “VCRUNTIME140_1.dll was not found” you must first install the Microsoft Visual C++ Redistributable for Visual Studio 2019. This can be downloaded from Microsoft here: https://aka.ms/vs/16/release/vc_redist.x64.exe
To get started, you click the “START” button in the Launcher and OpenSpace will start with the selected profile, which is the default profile. Almost immediately, you should see a window that looks similar to this indicating that the selected profile is being loaded.
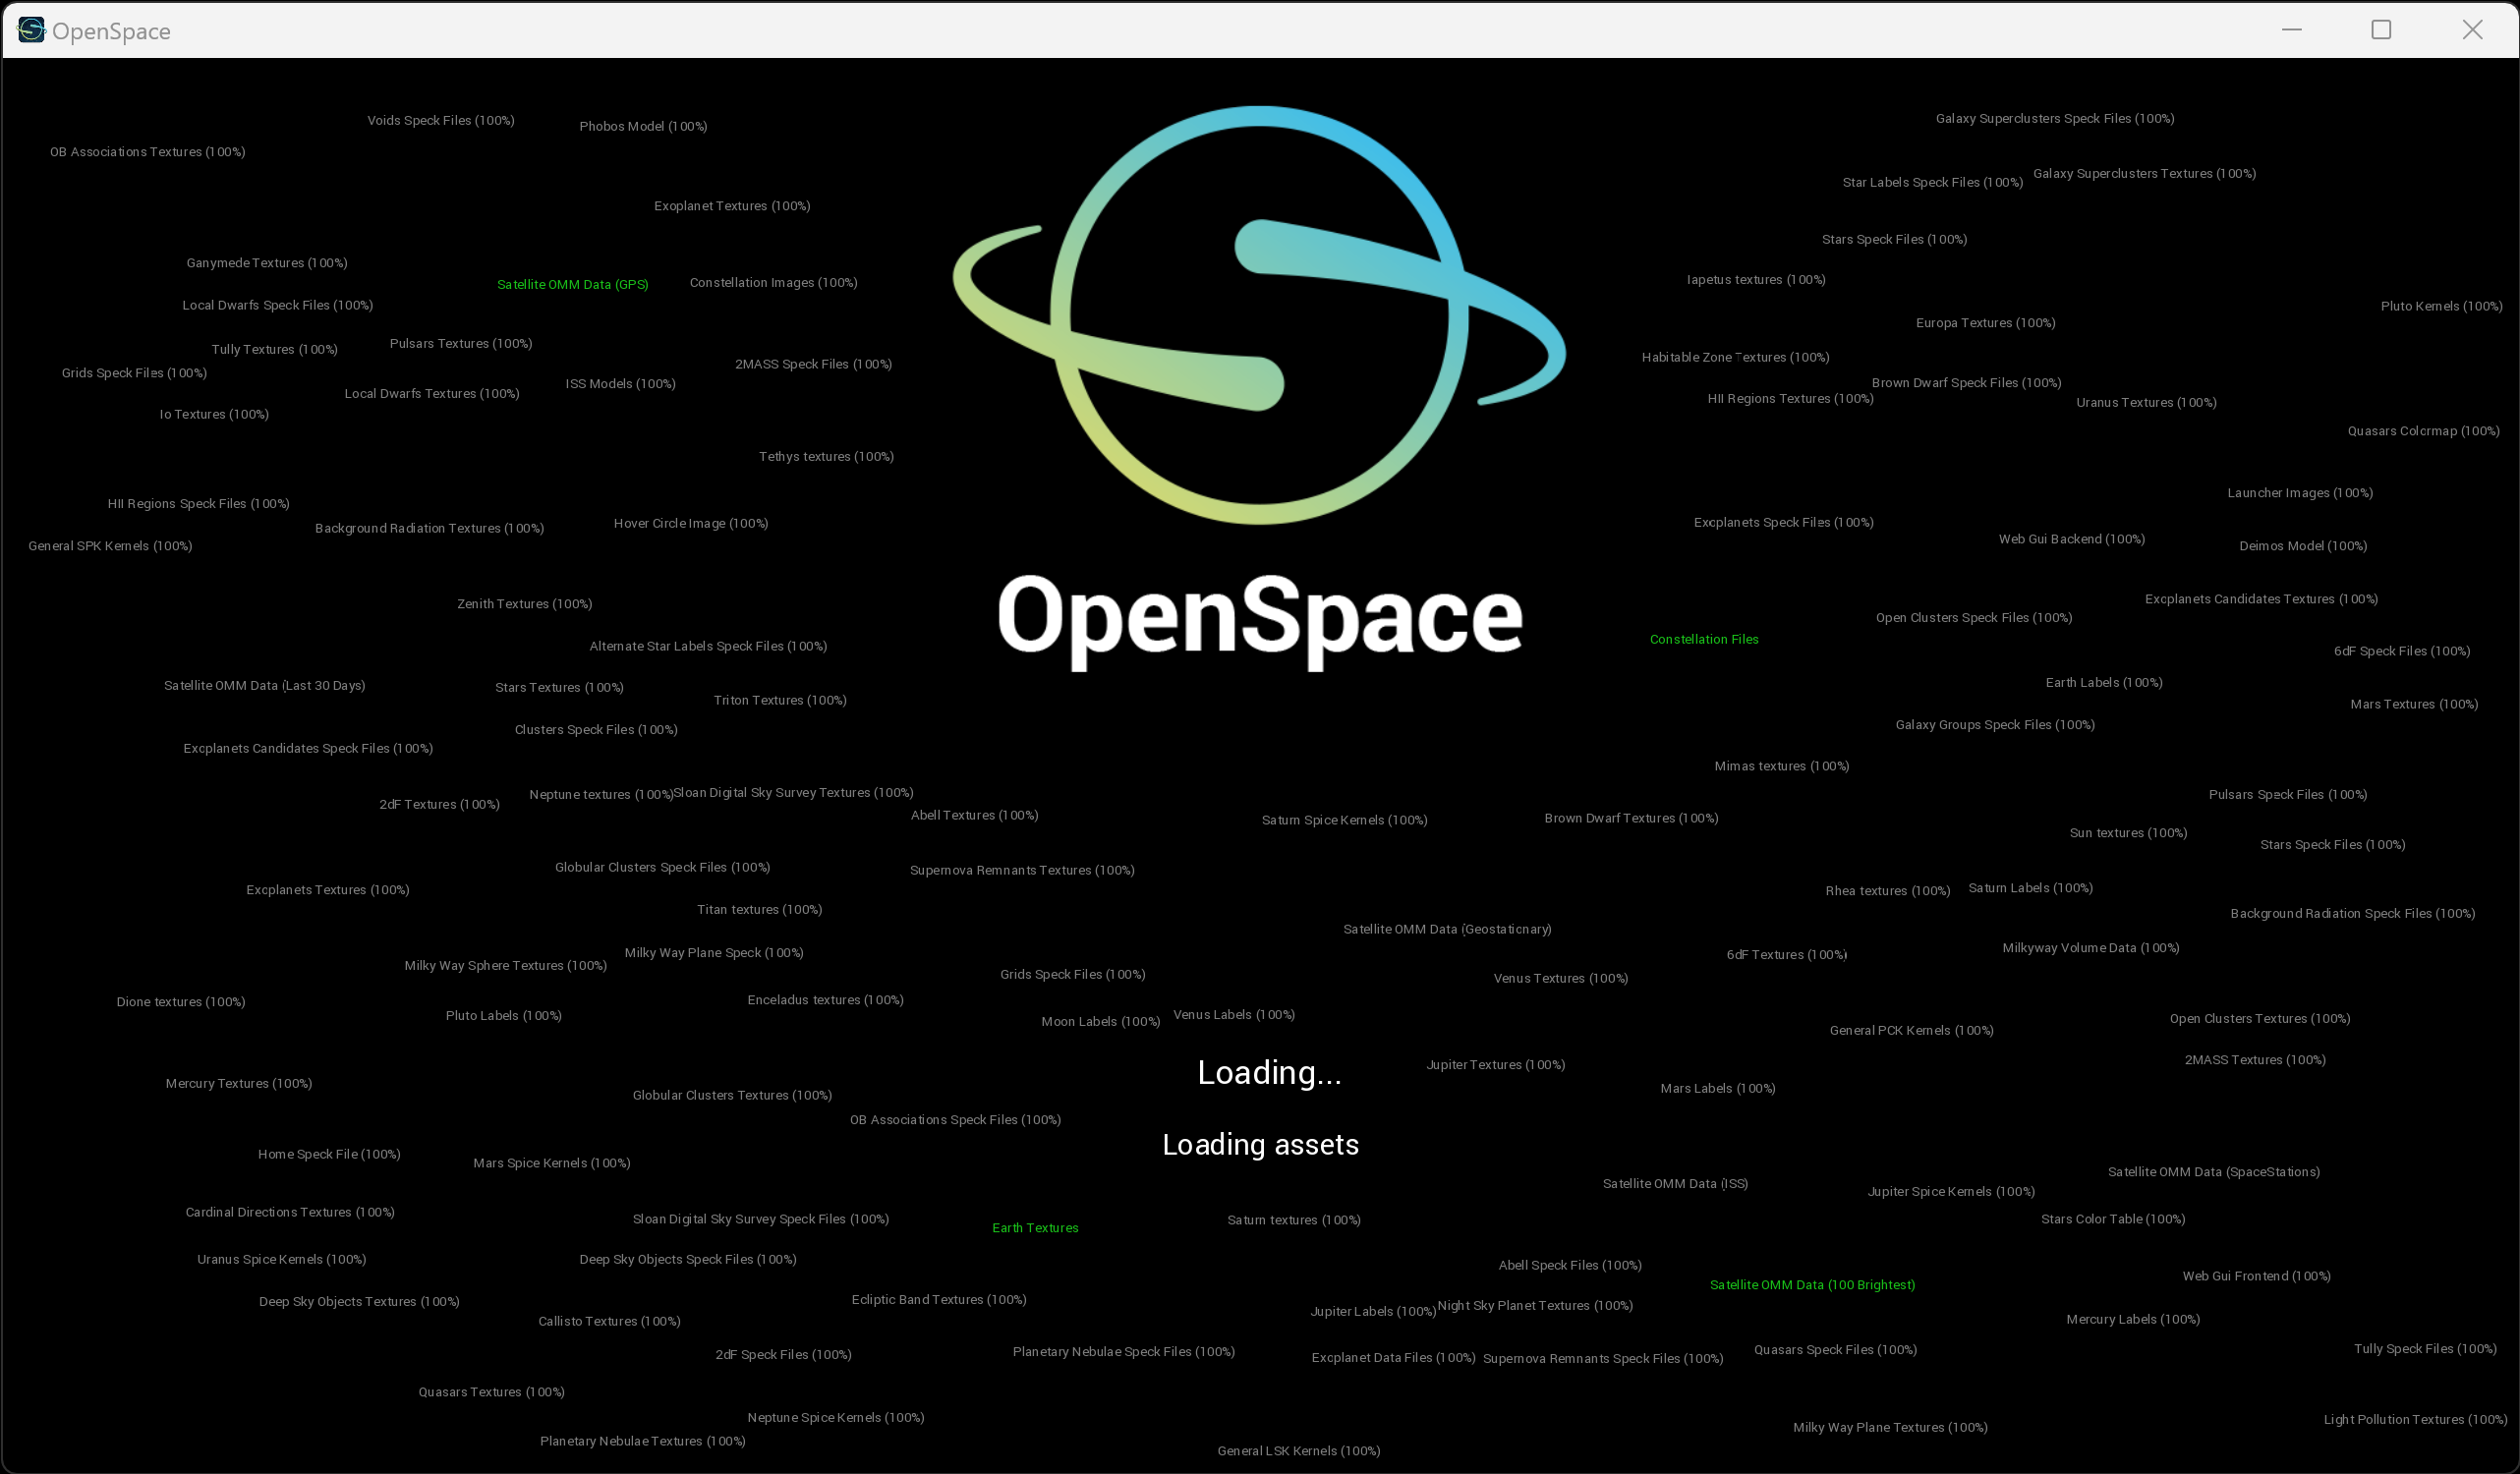
The loading screen of OpenSpace#
The length of the loading depends on the hardware of your setup but should, in general, not take longer than 2-3 minutes the first time you start OpenSpace. If the loading screen does not appear, please see the Handling Errors portion of the documentation. On Windows, you will see two firewall pop-up windows appear that both have to be accepted for OpenSpace to work. After a few minutes you should see the main window with Earth in view:
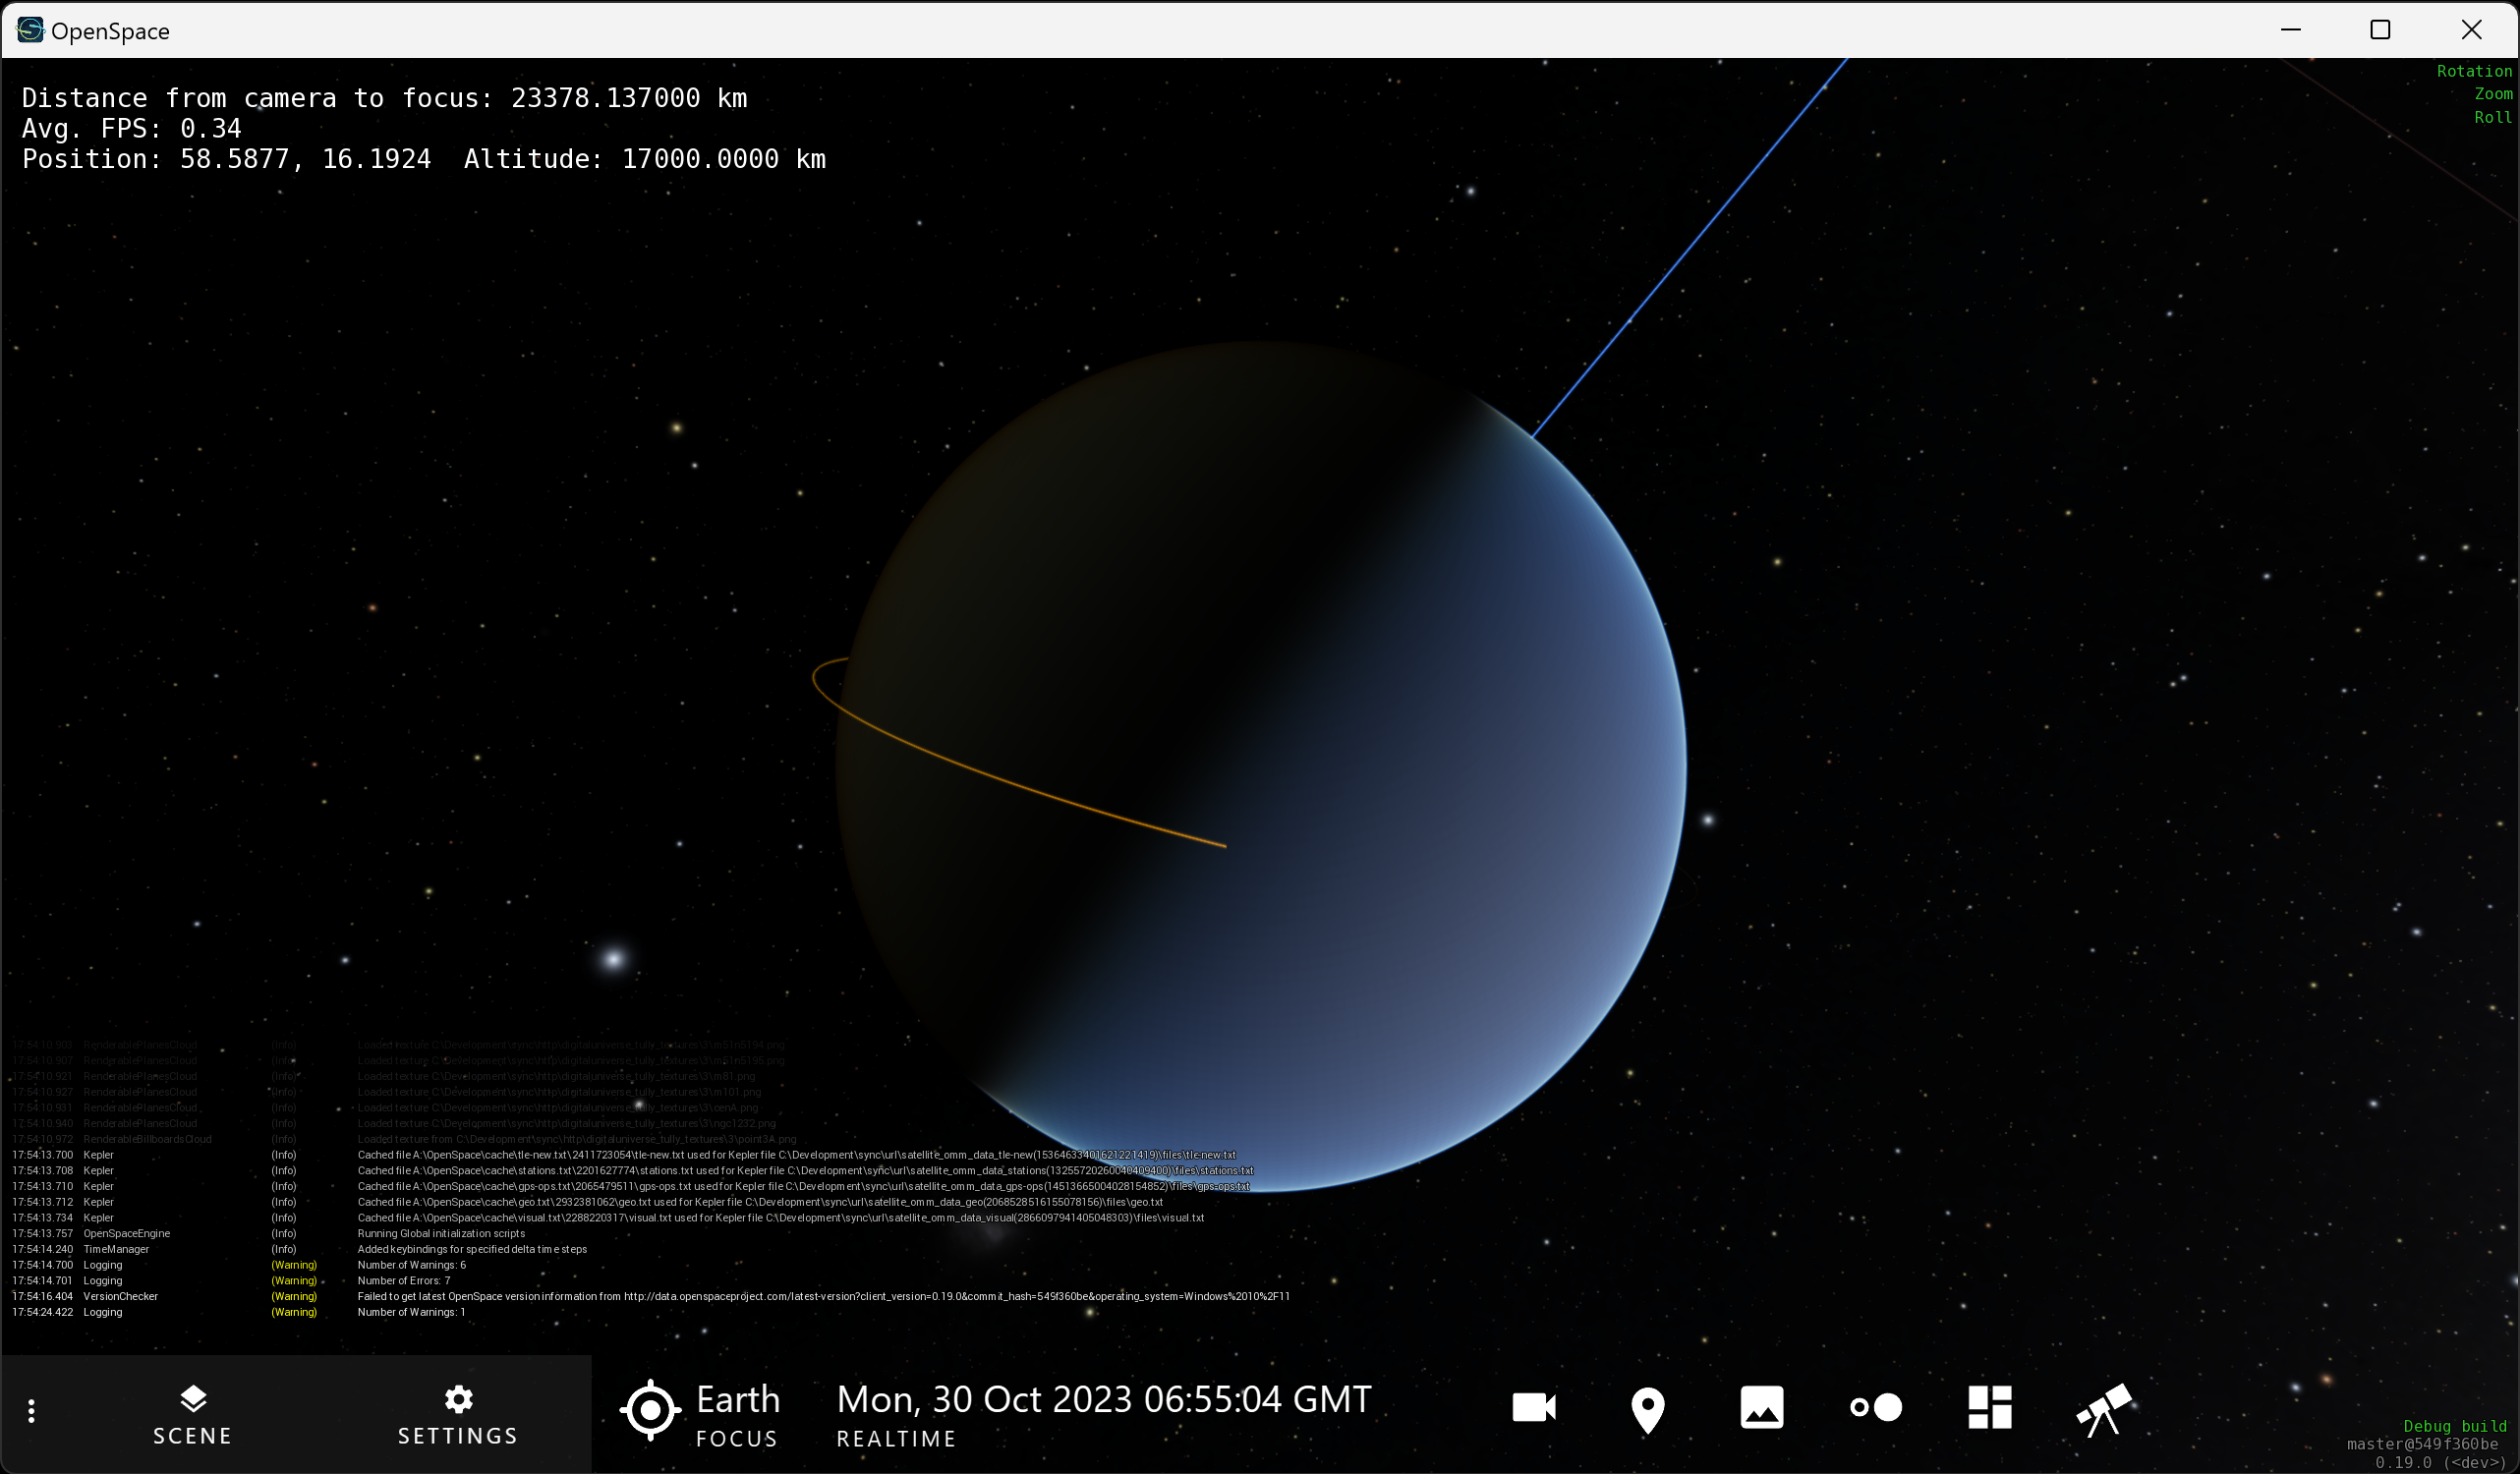
The main view of OpenSpace showing Earth#
Video time |
Description |
|---|---|
0:00 |
Download the zip file from the OpenSpace website. |
0:30 |
Get the zip file from your downloads and extract the OpenSpace folder. |
0:50 |
Find the .exe inside the extracted folder and create a desktop shortcut. |
1:04 |
Running the application for the first time, you will get a Windows protection pop-up. Click “More info” then “Run Anyway.” |
1:13 |
When the Launcher opens, start OpenSpace with the start button. |
1:15 |
You will be presented with more Windows protection pop-us, this time for the firewall. Click “Allow access” on each. |
1:35 |
OpenSpace is started and you can use the application. |
Windows frame rate issue
If your frame rate is low (the FPS number in the top left corner), please ensure that OpenSpace is using your NVIDIA graphics card. This can be adjusted in settings under the graphics.
Video time |
Description |
|---|---|
0:00 |
Download the pkg file from the OpenSpace website. |
1:45 |
Run the pkg file to install OpenSpace. |
2:33 |
If a MacOS installation “unidentified developer” error pops up, go to System Preferences, Security & Privacy and click “Open Anyways.” Another pop up will say the software cannot be verified. Click “Open.” |
3:28 |
Run the installer and close when it is complete. You can delete the pkg file when prompted. |
4:53 |
Select the installed OpenSpace folder and File > Get Info. In the info window, apply Read & Write privileges to the OpenSpace folder. |
5:23 |
Run the OpenSpace application, found in the bin folder. When the Launcher opens, start OpenSpace with the start button. |
6:25 |
Open OpenSpace in low resolution mode by selecting the application and going to File > Get Info. Check the box that says “Open in Low Resolution” and then run the application. |
MacOS Folder Permissions
As shown in the video, most users will need to adjust the folder permissions on the installed OpenSpace folder, and “Apply to Enclosed Items” as outlined here by Apple: https://support.apple.com/guide/mac-help/change-permissions-for-files-folders-or-disks-mchlp1203/mac
MacOS Installation “unidentified developer” error
If you try to launch OpenSpace and you get an error that the application is not registered with Apple by an identified developer, you can follow these steps from Apple to run OpenSpace anyway: https://support.apple.com/guide/mac-help/open-a-mac-app-from-an-unidentified-developer-mh40616/mac
Open in Low Resolution Mode
For users running on a Retina display, you may want to apply the “Open in Low Resolution Mode” setting on the OpenSpace.app to get better performance.
Interface#
When you first launch OpenSpace, you will be focused on Earth at the yesterdays date. In the top left corner of your window is your Dashboard.. By default, this displays:
Distance to the Focus in kilometers
Avg. FPS: Average frames per second
Position: Latitude and longitude position and altitude of the camera relative to the Focus object
You can modify this information (including the display font and size) in .
In the top right corner of your window are Friction Toggles, see the next part of the getting started guide about these controls.
In the bottom right corner of your window is Version Information, which is the current build and version number of OpenSpace you are using.
Along the bottom row are your Menus (also known as Graphical User Interface, or GUI). These menus, from left to right, are:
System
Scene
Settings
Navigation
Time
Session Recording
Slides
You can toggle the visibility of the text information using Shift+TAB and toggle the visibility of the menu with TAB.